New user setup#
🔰 Introduction#
🎉 Welcome to the Turing Data Safe Haven! 🎉
Trusted research environments (TREs) for analysis of sensitive datasets are essential to give data providers confidence that their datasets will be kept secure over the course of a project. The Data Safe Haven is a TRE that is designed to be as user-friendly as possible while still keeping the data safe.
The more sensitive the data you are working with, the higher the level of security within the TRE. This will affect things like:
whether you have internet access from inside the TRE
whether you’re allowed to copy and paste between your computer and the TRE
which software tools and libraries you are able to install
Important
Please read this user guide carefully and remember to refer back to it when you have questions. In many cases the answer is already here, but if you think this resource could be clearer, please let us know so we can improve the documentation for future users.
Definitions#
The following definitions might be useful during the rest of this guide
- Data Safe Haven
the overall TRE which supports multiple projects
- Secure Research Environment (SRE)
the environment set up for your project that you will use to access the sensitive data.
- Username domain
the domain (for example projects.example.org) which your user account will belong to. Multiple projects can share the same domain.
- SRE ID
each SRE has a unique short ID, for example sandbox which your System Manager will use to distinguish different SREs in the same Data Safe Haven.
- SRE URL
each SRE has a unique URL (for example sandbox.projects.example.org) which is used to access the data.
🚀 Set up your account#
This section of the user guide will help you set up your new account on the SRE you’ll be using.
🌱 Prerequisites#
Make sure you have all of the following when connecting to the SRE.
💻 Your computer.
🔧 Your username and the username domain for your SRE.
🏰 The URL for your SRE.
📡 Access to a specific wired or wireless network (if this is required for your project).
📱 Your phone, with good signal connectivity.
Important
You should have received an email from your System Manager with your account details, the URL for your SRE, and any necessary network or training requirements for your project.
You should also know who the designated contact for your SRE is. This might be an administrator or one of the people working on the project with you. They will be your primary point of contact if you have any issues in connecting to or using the SRE.
Username#
Your username comes in both a short-form and a long-form
short-form: usually be in the format GIVEN_NAME.LAST_NAME
long-form: USERNAME@USERNAME_DOMAIN
Caution
If you have a hyphenated last name, or multiple surnames, or a long family name, your short-form username may differ from this pattern. Please check with the designated contact for your SRE if you are unsure about your username.
Note
In this document we will use Ada Lovelace as our example user. Her username is:
short-form: ada.lovelace
long-form: ada.lovelace@projects.example.org
Network access#
The SRE that you’re using may be configured to allow access only from a specific set of IP addresses. This may involve being connected to a specific wired or wireless network or using a VPN. You also may be required to connect from a specific, secure location. If your SRE has any network requirements, you will be told what these are.
Tip
Make sure you know the networks from which you must connect to your SRE. This information will be available in the email you received with your connection information.
Data security training requirements#
Depending on your project, you may be required to undertake data security awareness training.
Tip
Check with your designated contact to see whether this is the case for you.
Your phone for multi-factor authentication#
Multi-factor authentication (MFA) is one of the most powerful ways of verifying user identity online. We therefore use MFA to protect the project data - specifically, we will use your phone number.
Important
Make sure to have your phone with you and that you have good signal connectivity when you are connecting to the SRE.
Caution
You may encounter some connectivity challenges if your phone network has poor connectivity. The SRE is not set up to allow you to authenticate through other methods.
Domain names#
You should be given the username domain in the initial email from your System Manager. You might receive the SRE URL at this time, or you might be assigned to a particular SRE at a later point.
Note
In this document Ada Lovelace - our example user - will be participating in the sandbox project.
Her username domain is projects.example.org.
Her SRE URL is https://sandbox.projects.example.org.
🔐 Password and MFA#
For security reasons, you must reset your password before you log in for the first time. Please follow these steps carefully.
1. Start the password reset process
Go to
https://aka.ms/mfasetupin a private/incognito browser session on your computer.Tip
One of the most common problems that users have in connecting to the SRE is automatic completion of usernames and passwords from other accounts on their computer. This can be quite confusing, particularly for anyone who logs into Microsoft services for work or personal use.
Caution
Look out for usernames or passwords that are automatically completed, and make sure that you’re using the correct details needed to access the SRE.
2. Follow the password recovery steps
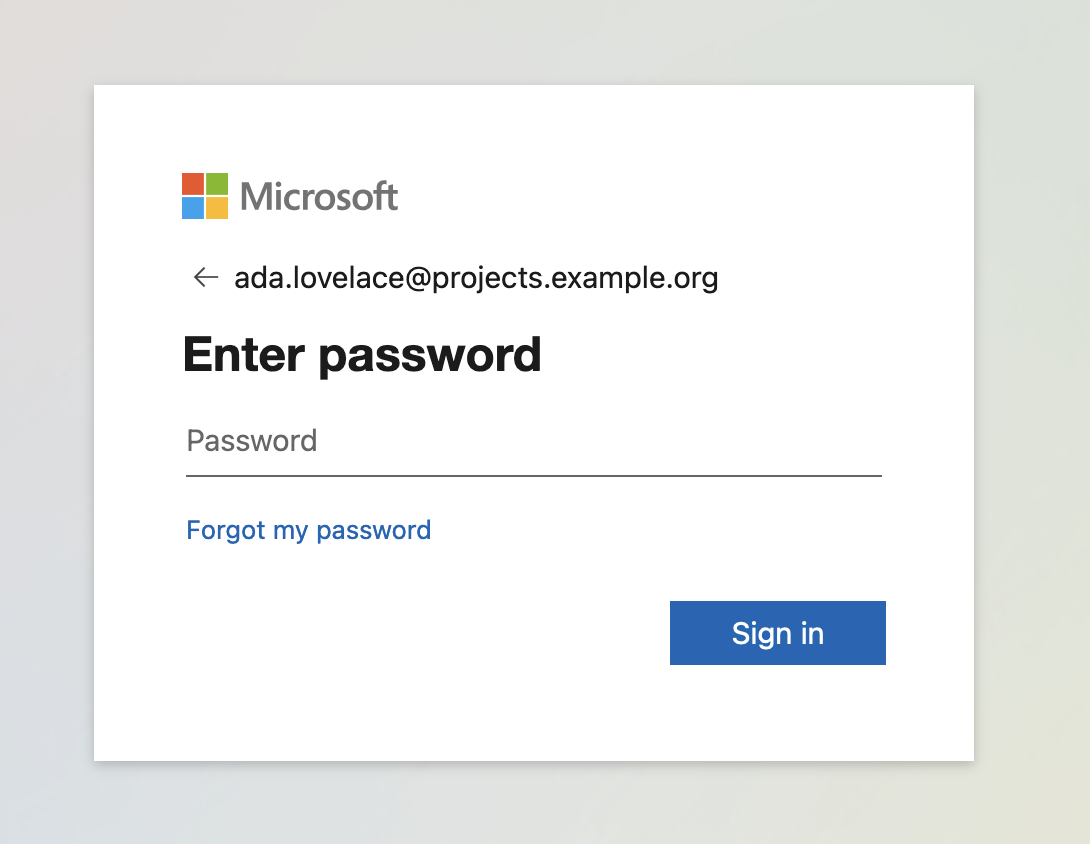
At the login prompt enter your long-form username and click on the Next button
Note
Our example user, Ada Lovelace, participating in the sandbox project, would enter ada.lovelace@projects.example.org
At the password prompt click the Forgotten my password link.
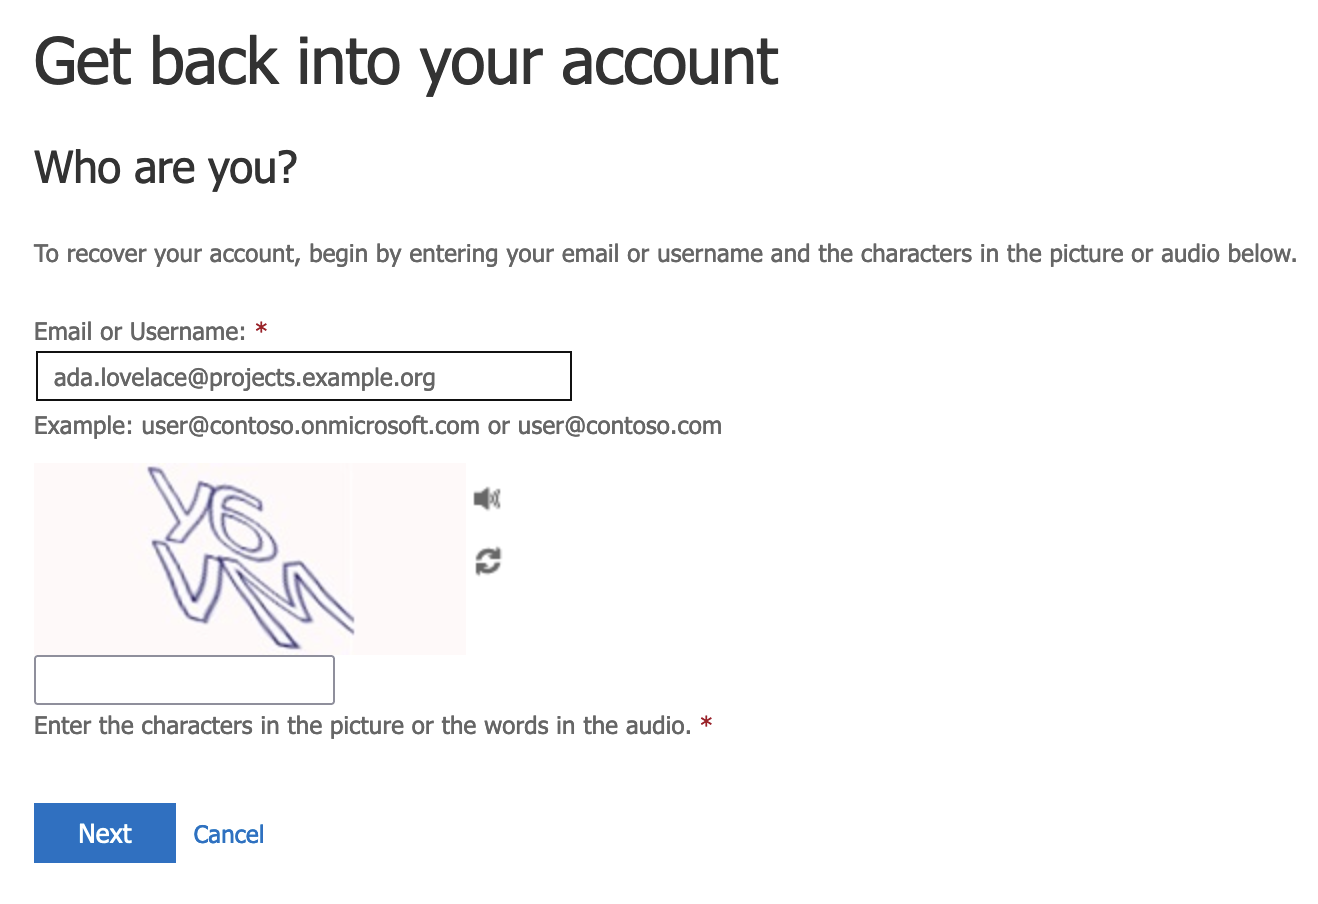
3. Fill out the CAPTCHA
Fill out the requested CAPTCHA (your username should be pre-filled) then click on the Next button.
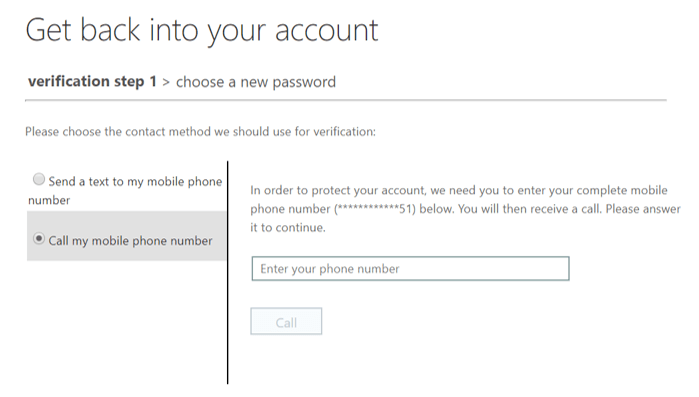
4. Confirm your contact details
Confirm your phone number or email address, which you provided to the System Manager when you registered for access to the environment.
5. Set your password
Select a password that complies with the Microsoft Entra requirements:
Tip
We suggest the following:
minimum 12 characters
only alphanumeric characters
at least one each of:
🔠 uppercase character
🔡 lowercase character
🔢 number
not used anywhere else
use a password generator to ensure you meet these requirements
Caution
We recommend avoiding special characters or symbols in your password! The virtual keyboard inside the SRE may not be the same as your physical keyboard and this can make it difficult to type some symbols.
Enter your password into the Enter new password and Confirm new password fields.

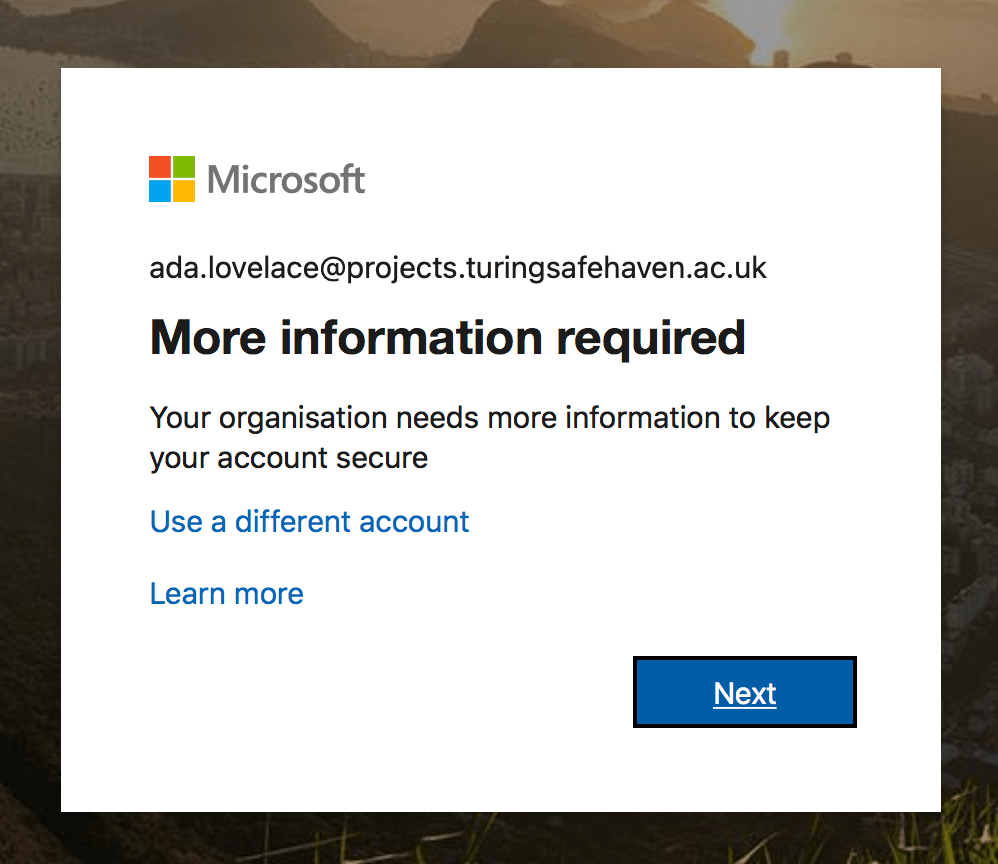
Click on the Finish button and you should get this notice
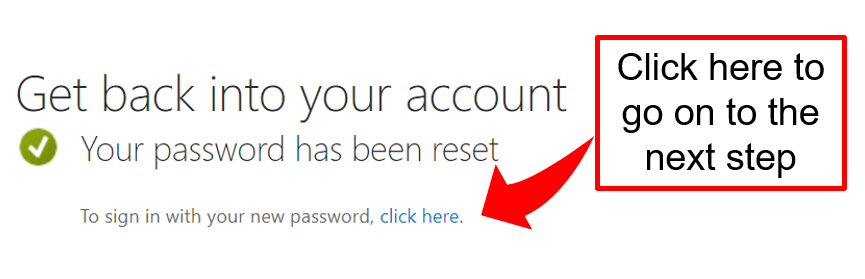
Click on this link and provide your username and password when prompted.
At this point you will be asked for additional security verification.
🚪 Set up multi-factor authentication#
The next step in setting up your account is to authenticate your account from your phone. This additional security verification is to make it harder for people to impersonate you and connect to the environment without permission. This is known as multi-factor authentication (MFA). The Data Safe Haven requires that you use a phone app for MFA - this can be Microsoft Authenticator or another authenticator app.
🍱 Microsoft Authenticator app#
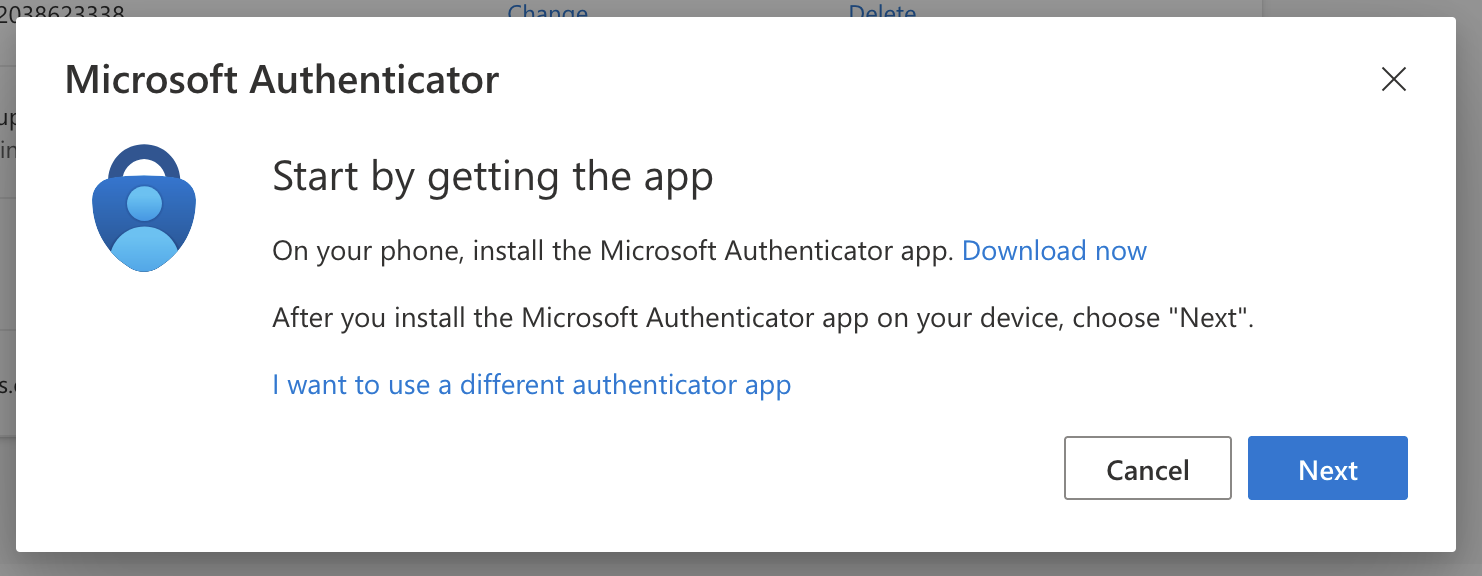
1. Download the Microsoft Authenticator app
Search for Microsoft Authenticator in your phone’s app store or follow the appropriate link for your phone here:
🍎 iOS:
https://bit.ly/iosauthenticator🤖 Android:
https://bit.ly/androidauthenticator🍱 Windows mobile:
https://bit.ly/windowsauthenticatorImportant
You must give permission for the authenticator app to send you notifications for the app to work as an MFA method.
2. Add sign-in method
Click on + Add sign-in method and select Authenticator app.
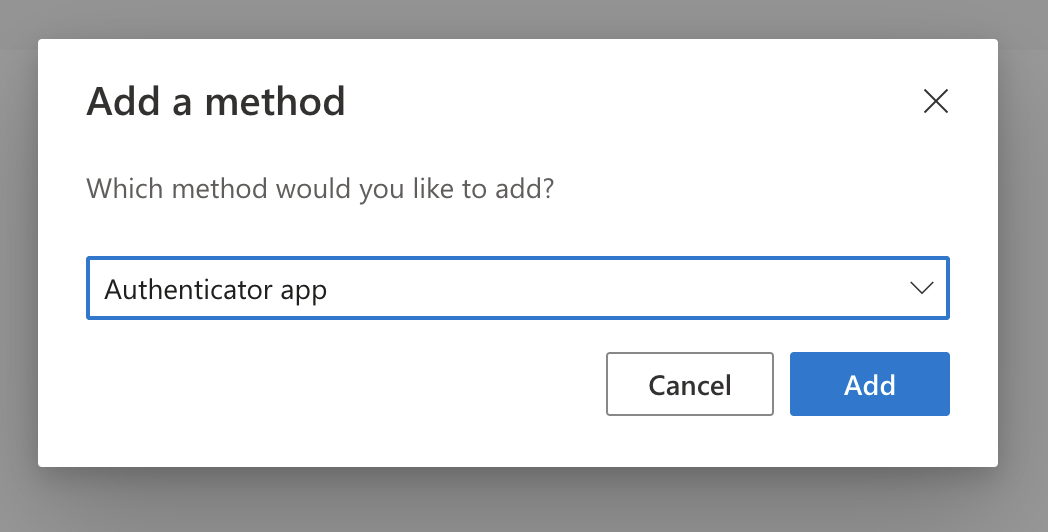
At the Getting the app click on Next.
Open the Microsoft Authenticator app
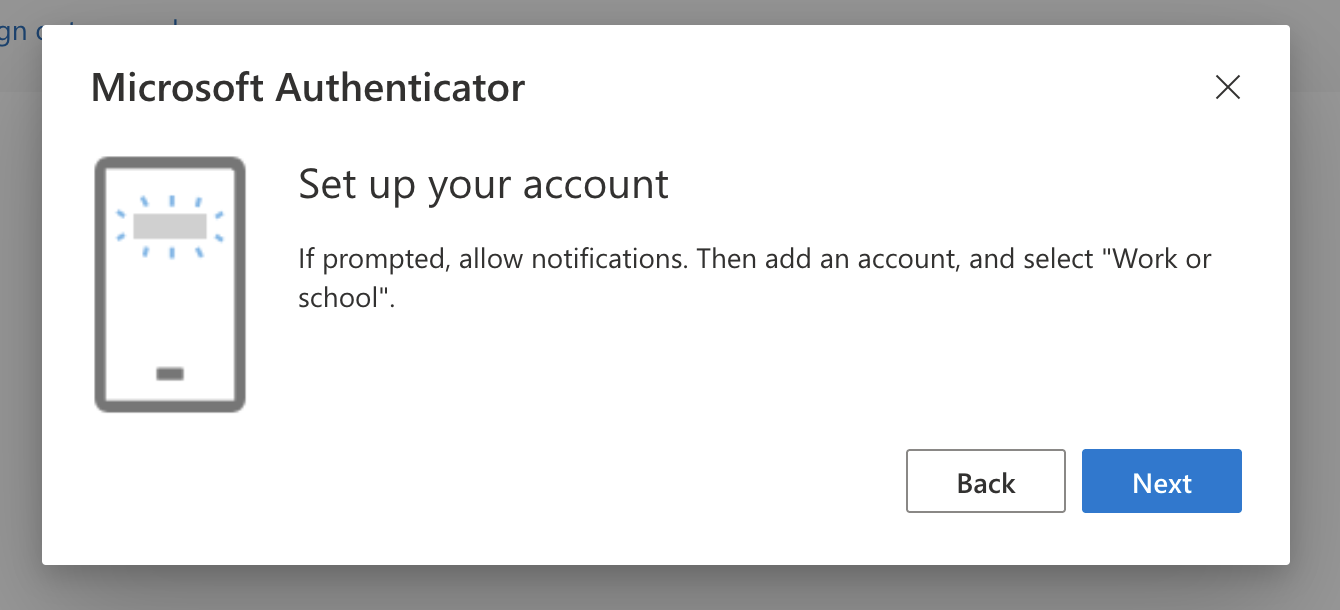
3. Register your app
From the Microsoft Authenticator app
Select Add an account
Select Work or School account
From your browser, at the on-screen prompt click on Next.
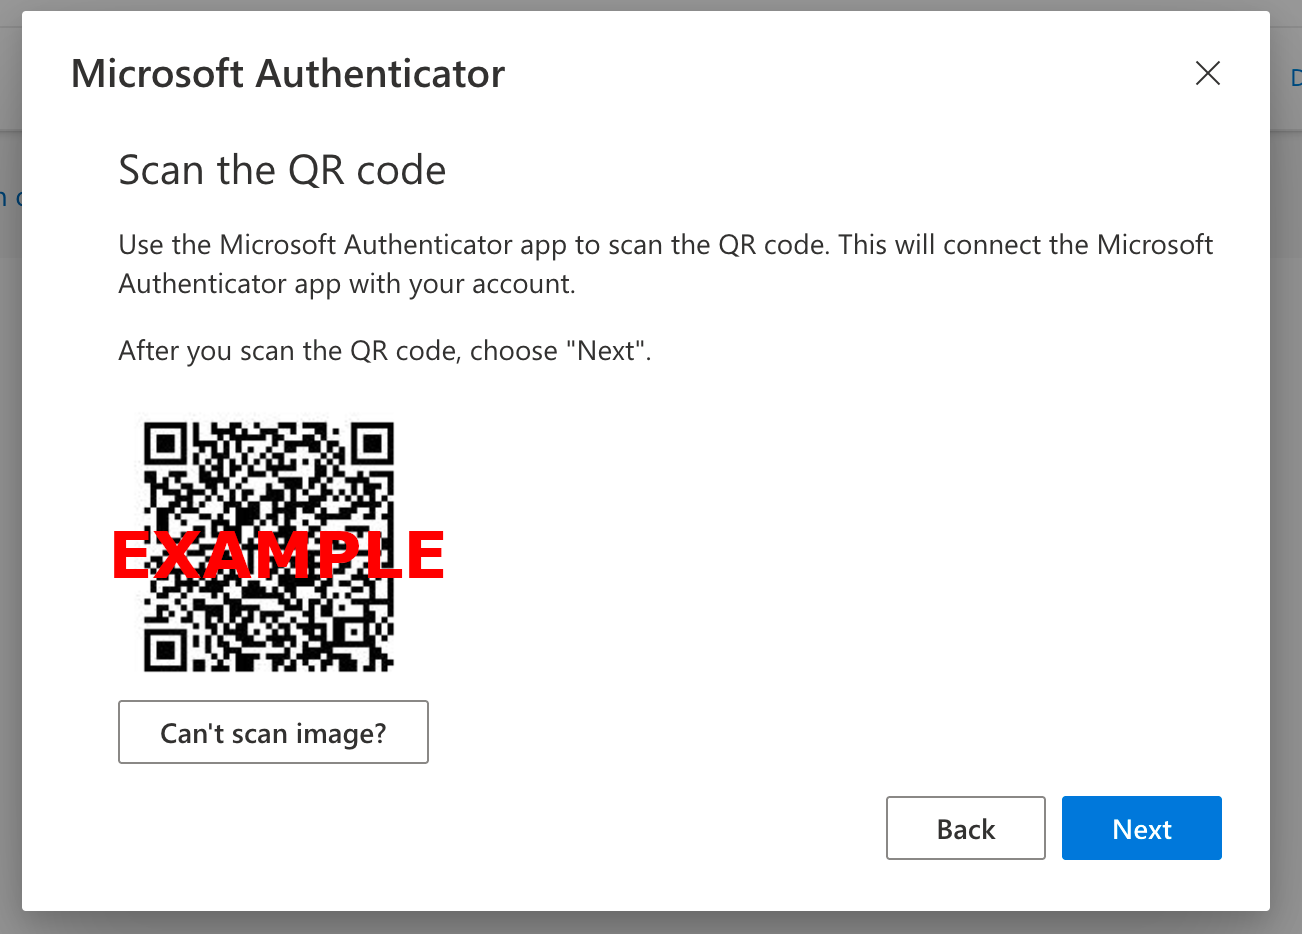
The next prompt will give you a QR code to scan, like the one shown below
Scan the QR code on the screen then click Next
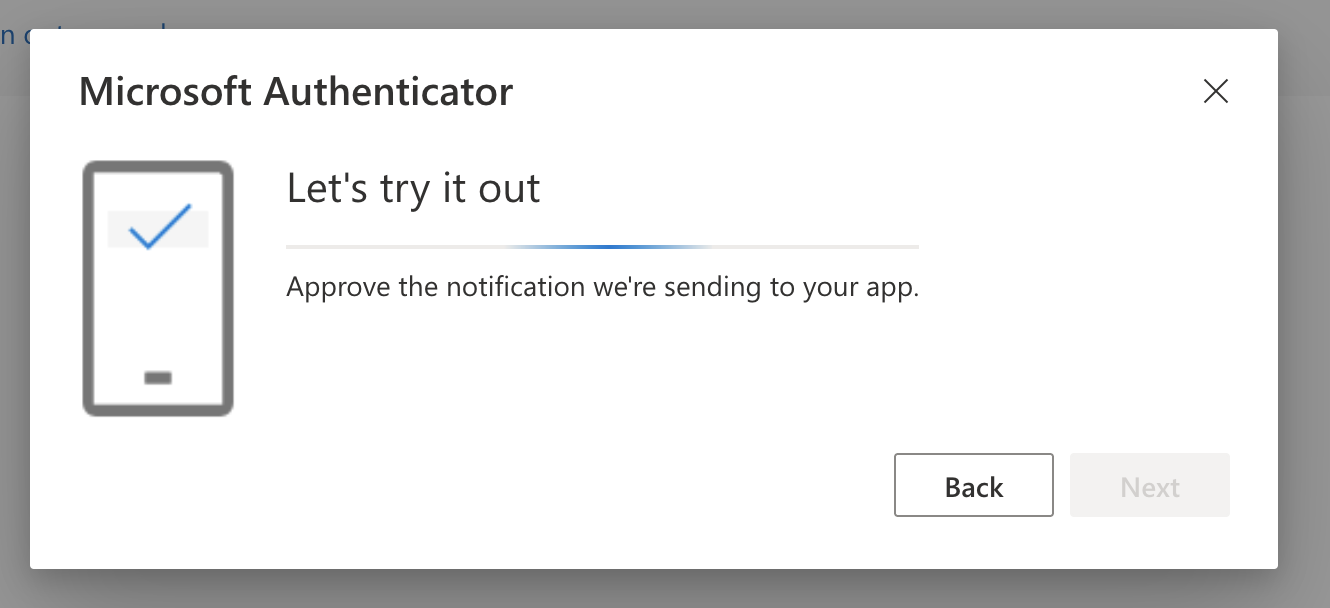
Once this is completed, Microsoft will send you a test notification to respond to
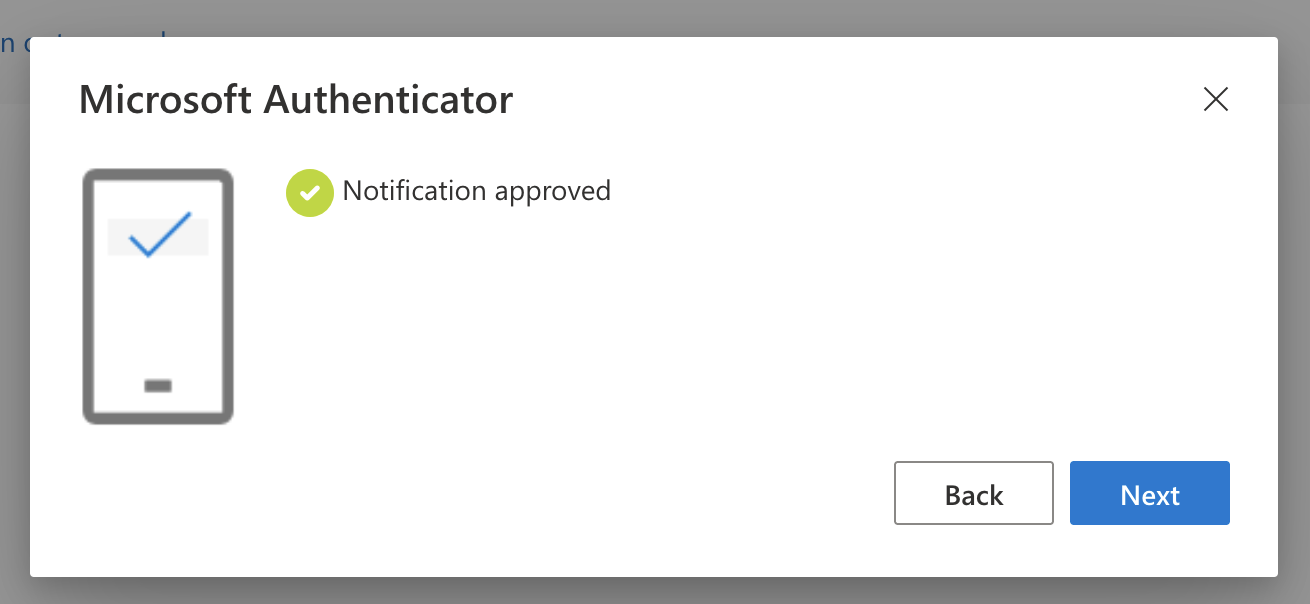
When you click Approve on the phone notification, you will get the following message in your browser
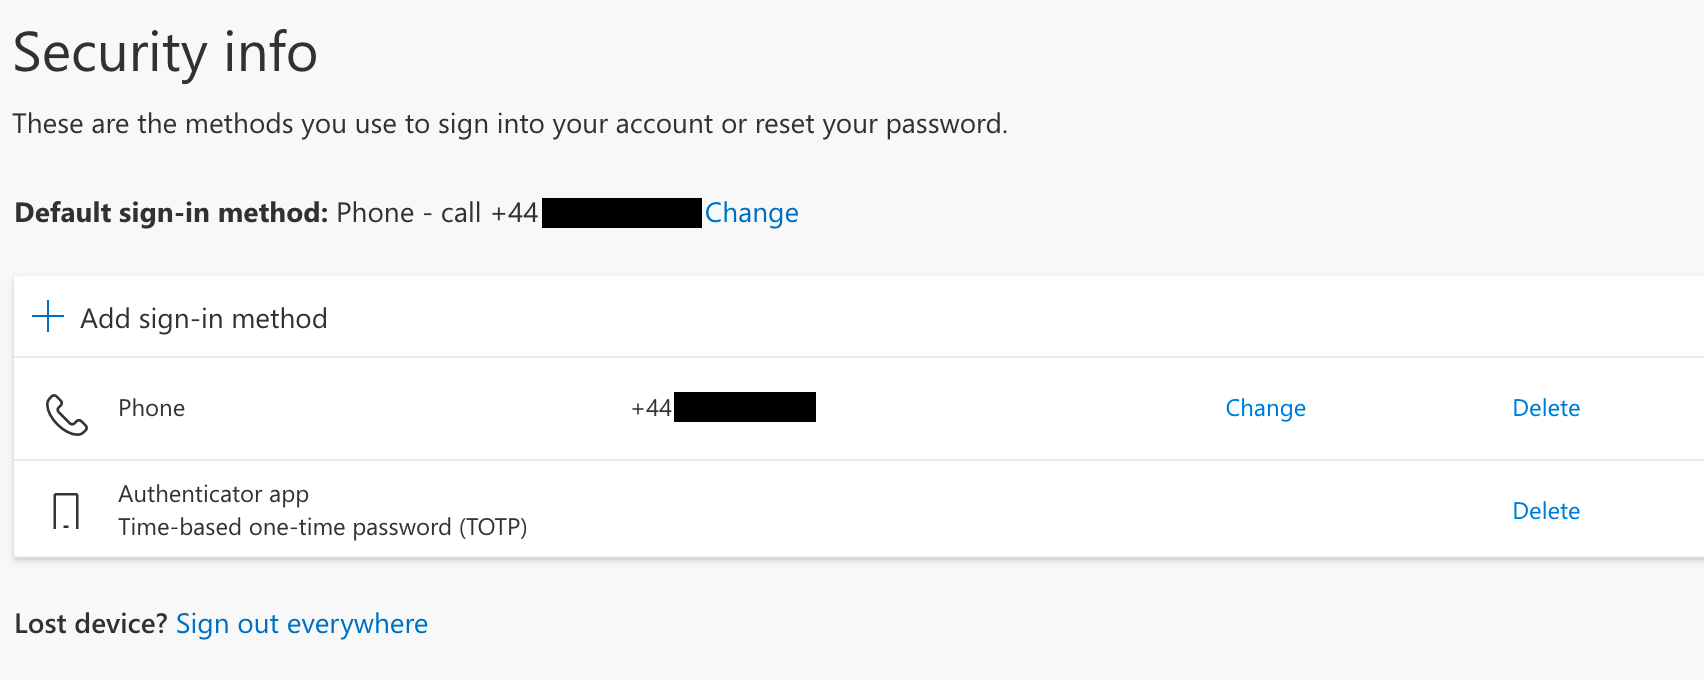
4. Check the Security Information dashboard
You should now be returned to the Security Information dashboard that shows the Microsoft Authenticator method.
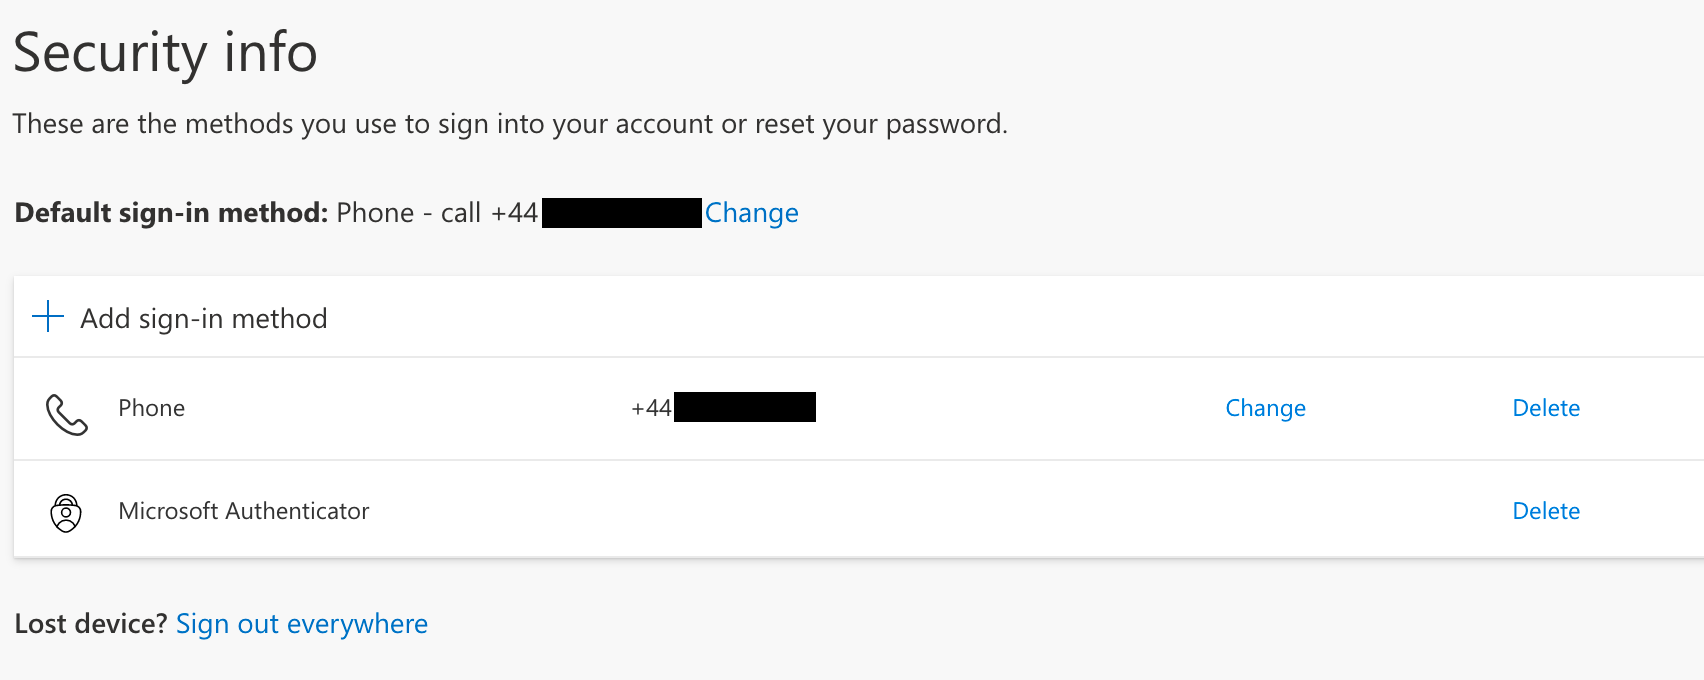
Choose whichever you prefer to be your Default sign-in method.
📱 Alternate authenticator app#
1. Download an authenticator app
Choose an authenticator app that supports time-based one-time password (TOTP).
One example is Google Authenticator.
Important
You must give permission for the authenticator app to send you notifications for the app to work as an MFA method.
2. Add sign-in method
Click on + Add sign-in method and select Authenticator app.
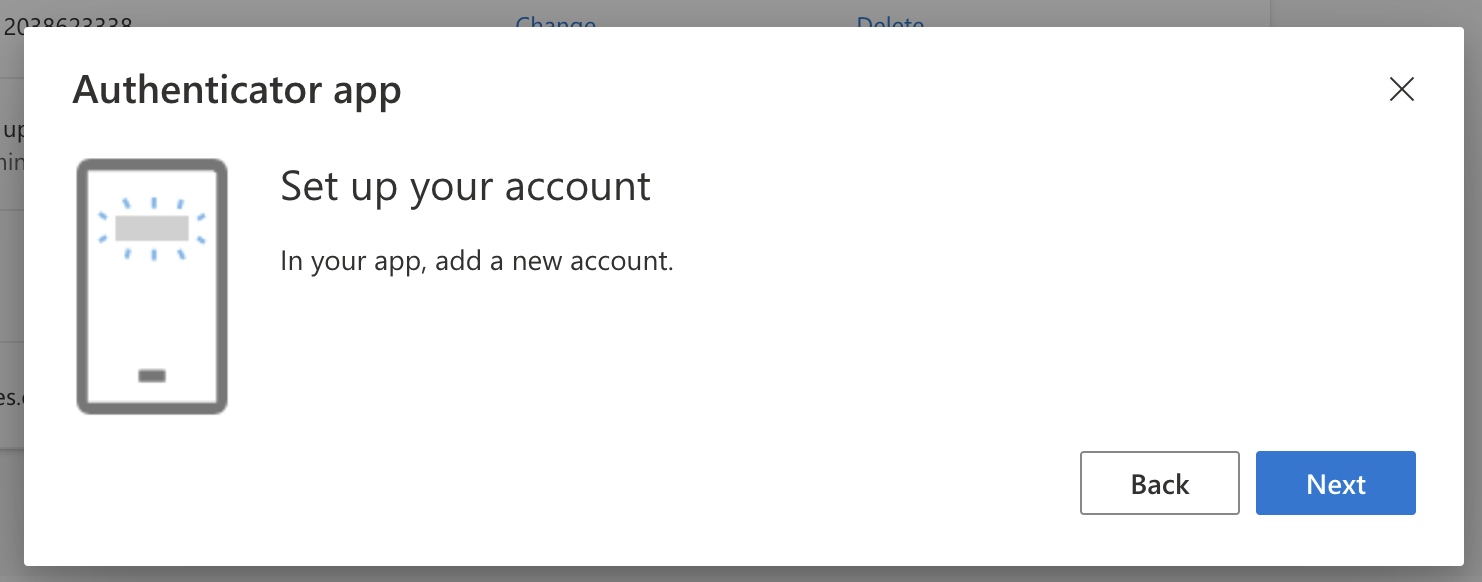
At the Getting the app click on I want to use a different authenticator app.
Open your authenticator app
3. Register your app
Follow the steps in your authenticator app to add a new account
At the on-screen prompt click on Next.
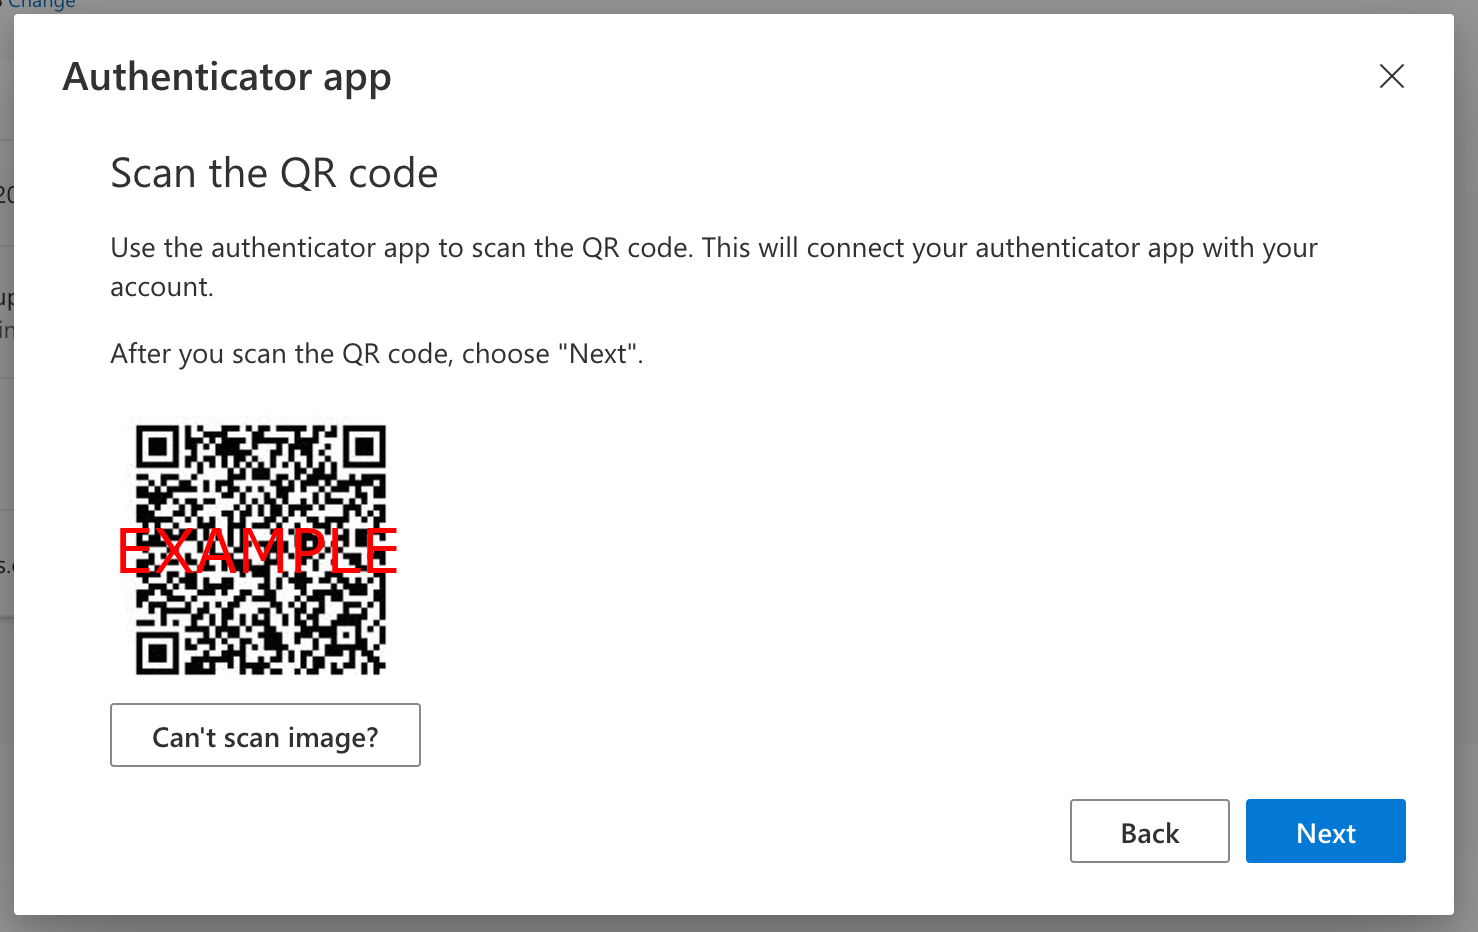
The next prompt will give you a QR code to scan, like the one shown below
Scan the QR code on the screen then click Next
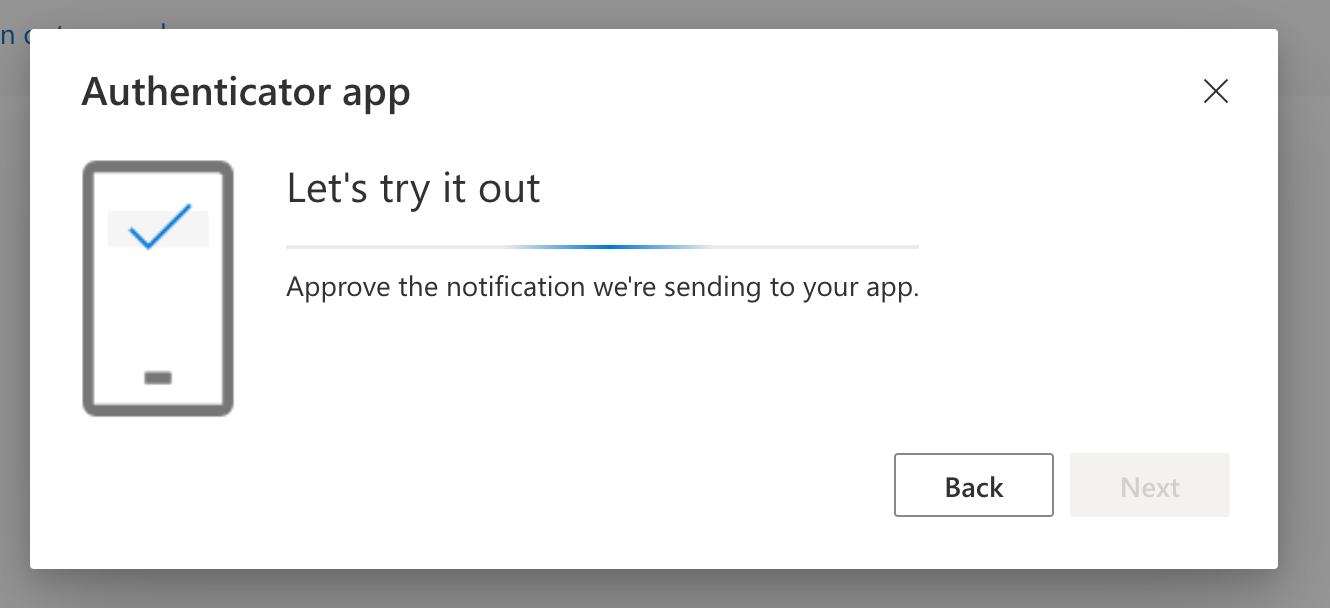
Once this is completed, Microsoft will send you a test notification to respond to
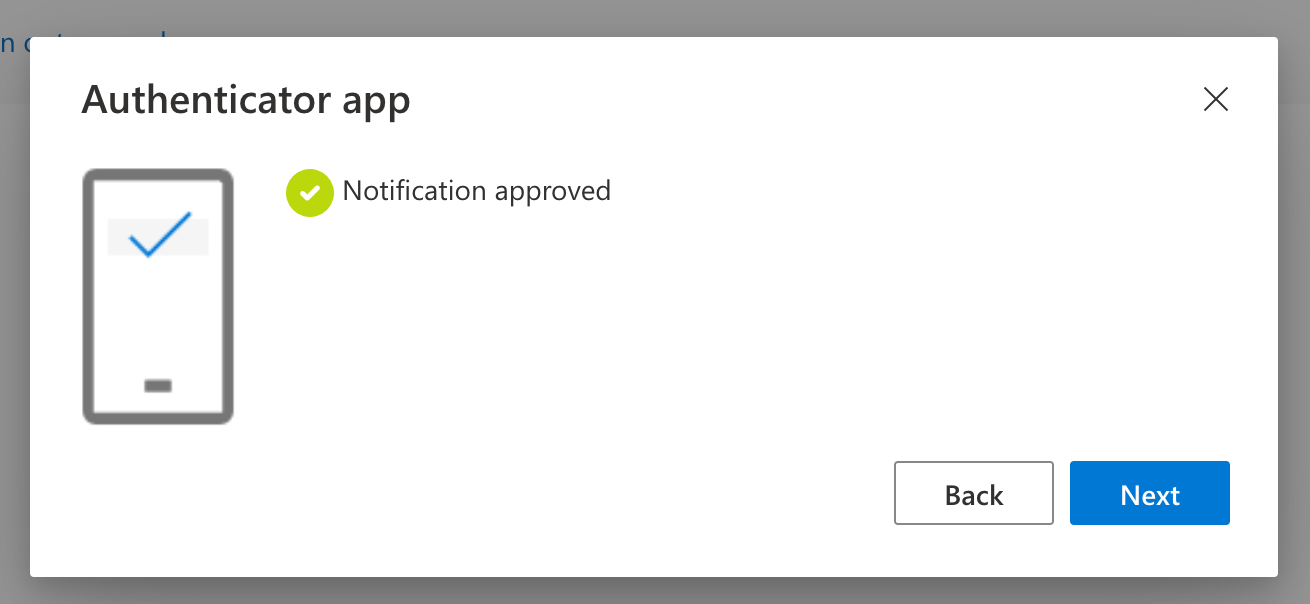
When you click Approve on the phone notification, you will get the following message in your browser
4. Check the Security Information dashboard
You should now be returned to the Security Information dashboard that shows the Authenticator app method.
Choose whichever you prefer to be your Default sign-in method.
Troubleshooting MFA#
Sometimes setting up MFA can be problematic. You may find the following tips helpful:
📥 Make sure you allow notifications on your authenticator app.
😴 Check you don’t have Do not Disturb mode on.
⚡ You have to be FAST at acknowledging the notification on your app, since the access codes update every 30 seconds.
😕 Sometimes just going through the steps again solves the problem