Deploy a Secure Research Environment#
These instructions will deploy a new Secure Research Environment (SRE).
Ensure you are using a hatch shell
You must use a hatch shell to run any dsh commands.
From the project base directory run:
$ hatch shell
This ensures that you are using the intended version of Data Safe Haven with the correct set of dependencies.
Note
As the Basic Application Gateway is still in preview, you will need to run the following commands once per subscription:
$ az feature register --name "AllowApplicationGatewayBasicSku" \
                      --namespace "Microsoft.Network" \
                      --subscription NAME_OR_ID_OF_YOUR_SUBSCRIPTION
$ az provider register --name Microsoft.Network
Configuration#
Each project will have its own dedicated SRE.
Create a configuration file (optionally starting from one of our standard Sensitivity tiers)
EITHER start from a blank template
$ dsh config template --file PATH_YOU_WANT_TO_SAVE_YOUR_YAML_FILE_TO
OR start from a predefined tier
$ dsh config template --file PATH_YOU_WANT_TO_SAVE_YOUR_YAML_FILE_TO \
                      --tier TIER_YOU_WANT_TO_USE
Edit this file in your favourite text editor, replacing the placeholder text with appropriate values for your setup.
Example YAML configuration file
azure:
  subscription_id: # ID of the Azure subscription that the TRE will be deployed to
  tenant_id: # Home tenant for the Azure account used to deploy infrastructure: `az account show`
description: # A free-text description of your SRE deployment
dockerhub:
  access_token: # The password or personal access token for your Docker Hub account. We strongly recommend using a Personal Access Token with permissions set to Public Repo Read-only
  username: # Your Docker Hub account name
name: # A name for your SRE deployment containing only letters, numbers, hyphens and underscores
sre:
  admin_email_address: # Email address shared by all administrators
  admin_ip_addresses: # List of IP addresses belonging to administrators
  data_provider_ip_addresses: # List of IP addresses belonging to data providers
  databases: # List of database systems to deploy
  remote_desktop:
    allow_copy: # True/False: whether to allow copying text out of the environment
    allow_paste: # True/False: whether to allow pasting text into the environment
  research_user_ip_addresses: # List of IP addresses belonging to users
  software_packages: # Which Python/R packages to allow users to install: [any/pre-approved/none]
  timezone: # Timezone in pytz format (eg. Europe/London)
  workspace_skus: # List of Azure VM SKUs that will be used for data analysis.
Upload the configuration file#
Upload the config to Azure. This will validate your file and report any problems.
$ dsh config upload PATH_TO_YOUR_EDITED_YAML_FILE
Hint
If you want to make changes to the config, edit this file and then run dsh config upload again
Deployment#
Deploy each SRE individually [approx 30 minutes]:
$ dsh sre deploy YOUR_SRE_NAME
Important
After deployment, you may need to manually ensure that backups function.
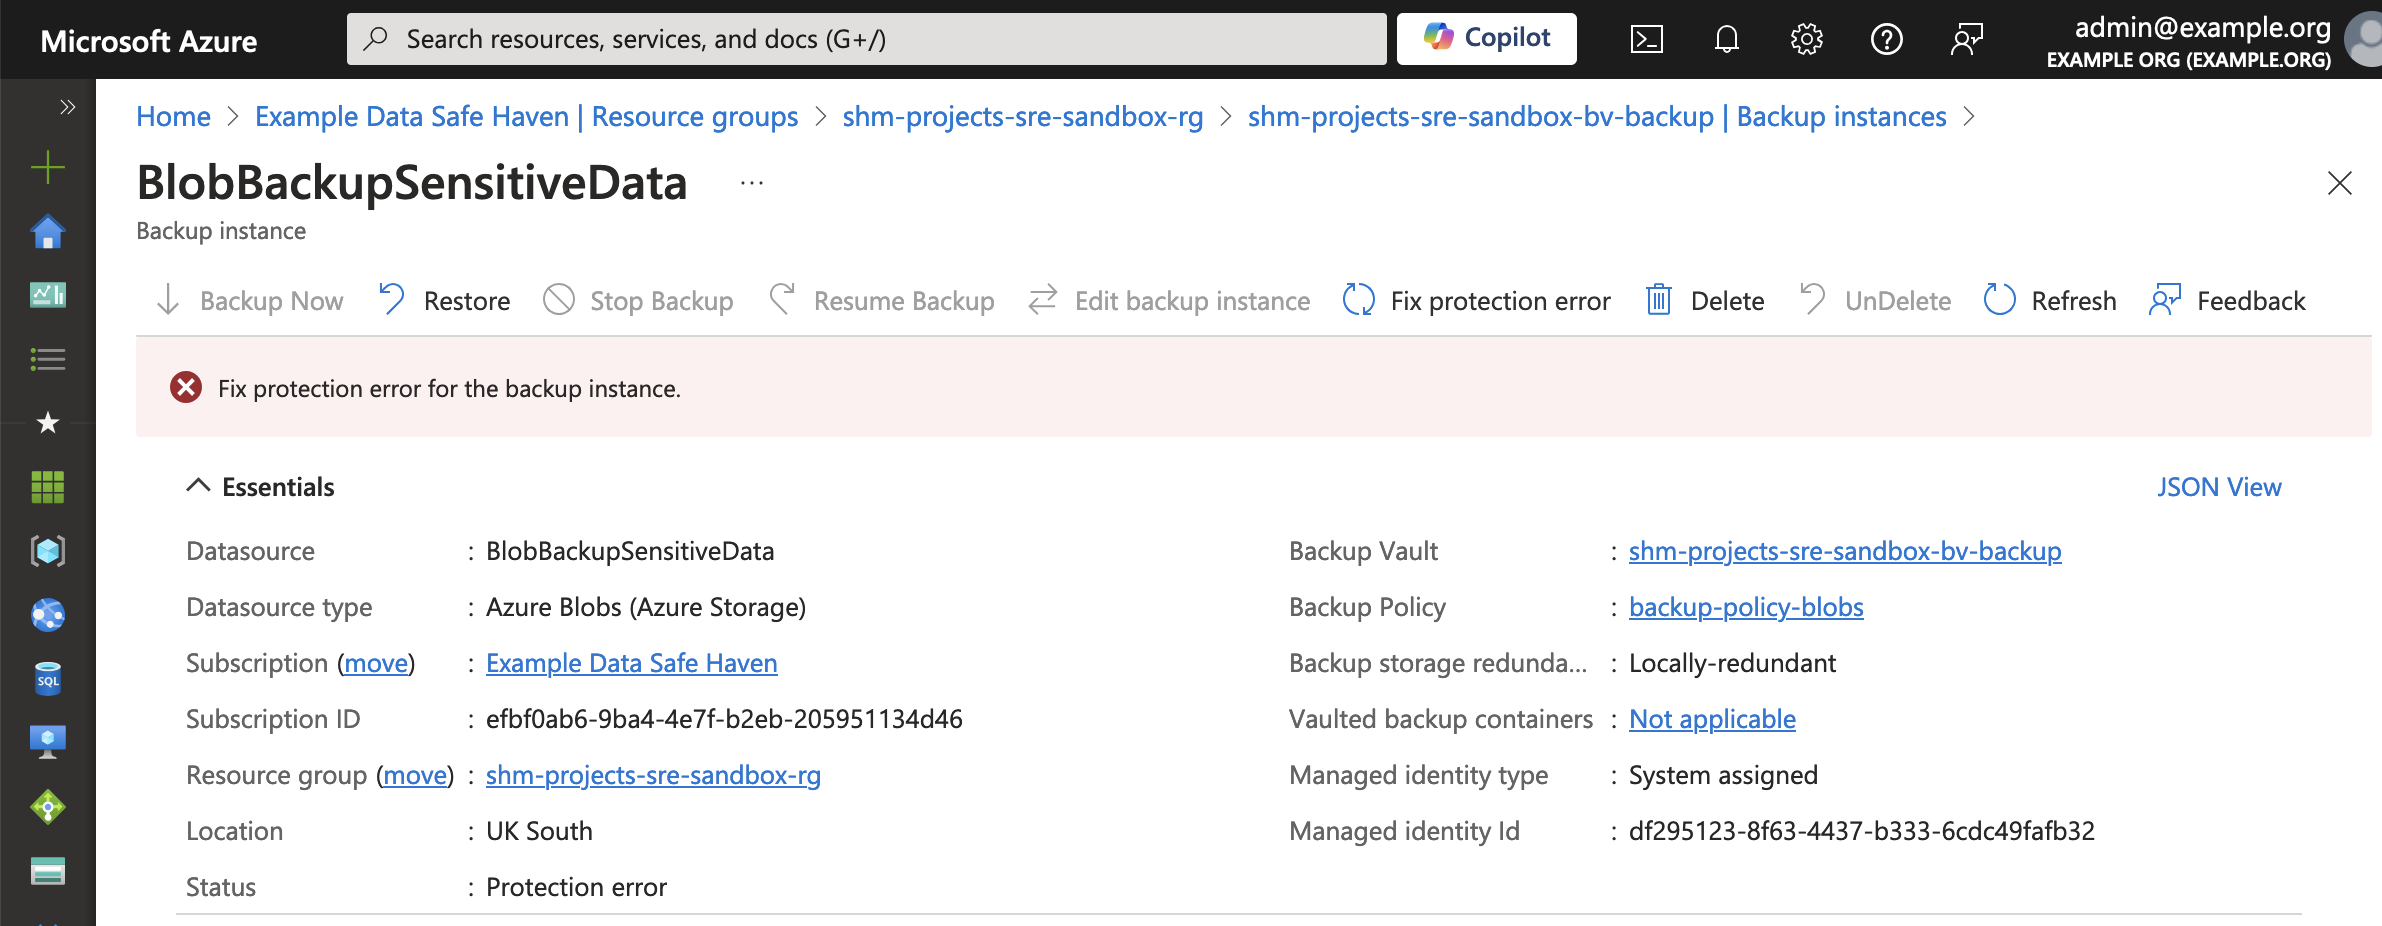
In the Azure Portal, navigate to the resource group for the SRE: shm-SHM_NAME-sre-SRE_NAME-rg
Navigate to the backup vault for the SRE: shm-SHM_NAME-sre-SRE_NAME-bv-backup
From the side menu, select
Change Datasource type to Azure Blobs (Azure Storage)
Select the BlobBackupSensitiveData instance
If you see the message Fix protection error for the backup instance, as pictured below, then click the Fix protection error button.